
All the techniques for successful French Seam
Do you dream of the perfect finish for your sewing, both inside and out? You may not yet be familiar with the French seam technique, which will enable you to achieve beautiful finishes.
In this article, we take a look at this technique, and I promise it’s easy!
When to use French seam?
French seam is a technique used for meticulous finishing. It is used to hide the fabric edges that can be seen on the inside of our garments. These seams may be appropriate if you don’t have a serger and are a perfectionist when it comes to finishing.
French seam have the advantage of being strong seams, because they are made in two steps, allowing the fabric to be doubly held. This makes them ideal for thin fabrics that tend to fray, and where a trip to the serger could result in fabric distortion.
How to sew an French seam to perfection?
French seam require no special equipment other than what you already have. All you need are your scissors, iron, sewing machine and a ruler.
Sewing French seams:
To make an French seam, you first need to think about the seam allowances on your pattern. But in order to best explain this to you, we first need to understand how to achieve this 2-stitch technique:
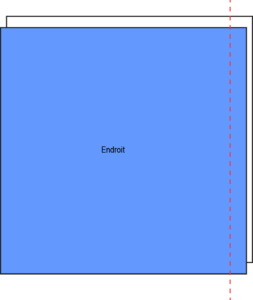
- Place your elements wrong sides together. Stitch all along at 5 mm seam allowance (you can adjust this measurement as you master the technique). Don’t forget the bartack at the beginning and end!
- Using your iron, open the seams.
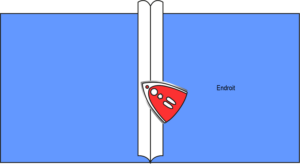
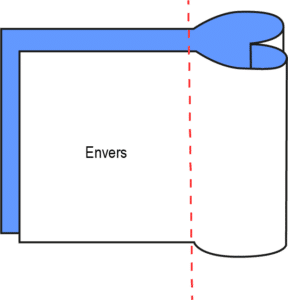
- Then fold your work right sides together before ironing again to flatten the seam.

- As an option, if you notice that your fabric is fraying a lot, you can cut the small threads with your scissors (be careful, just the threads that stick out – don’t cut too deeply into the fabric, as this could weaken your stitching).
- Make the last stitch, this time at a distance of 1 cm, always with a stop stitch at the beginning and end.
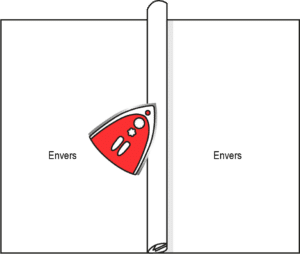
- On the reverse side of your work, if necessary, press your seam in the desired direction.
What you need to understand about seam allowances:
Be careful with commercial patterns that have margins included! If they’re not designed to be sewn with French seam, you won’t be able to apply this technique without a few minor modifications beforehand. So think carefully before cutting your fabric.
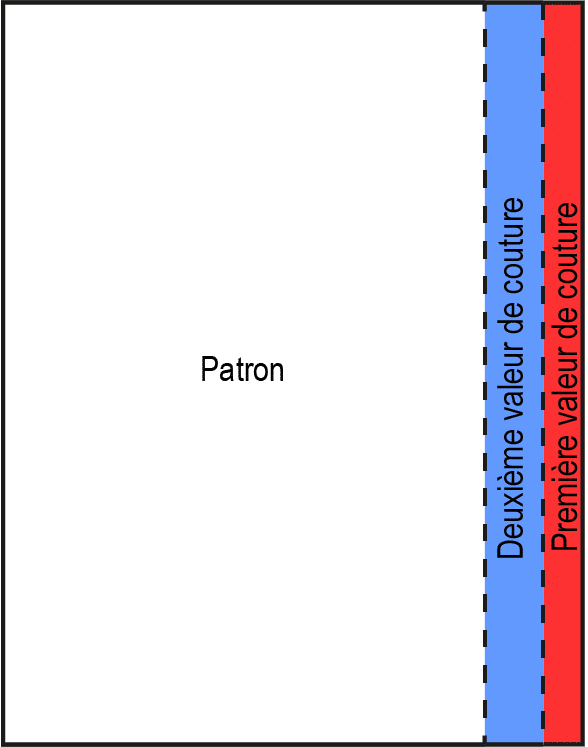
As we saw in the example above, the total seam allowance should be equal to the sum of the first and second seams (here 15 mm). If you have 10 mm seam values on the pattern, remember to add 5 mm.
But you can leave the pattern untouched, keep the 1 cm seam allowance, stitch the first seam at 4 mm (no less, for strength), and the second at 6 mm.
The important thing to remember is that the second seam value must be wider than the first, to hide the edges of the fabric on the inside.
Angles in French seam: child’s play!
We could stop there, but at some point you’re bound to come across an angle that may leave you breathless. Don’t panic: you can apply the French seam technique to these corners too. And you’ll see, it’s not complicated at all! The secret lies in the tracing and the first stitching.
Sew this seam at an internal angle:
- Place your fabric wrong-side up, and mark your stitching values at 5 and 15 mm (the second is 10 mm from the first at 5 mm).
- On either side of the angle drawn on the 5 mm seam value, make a 10 mm mark.
- Connect this mark with the seam value angle 15 mm from the edge.
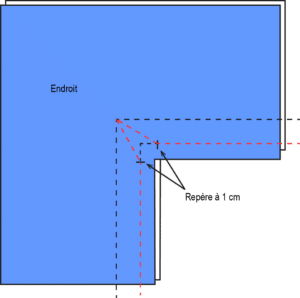
- Stitch the first seam at 5 mm along the line created in the previous step (dotted red on the drawing).
- Clip in the corner, stopping at 1 mm (be careful not to cut the wire!).

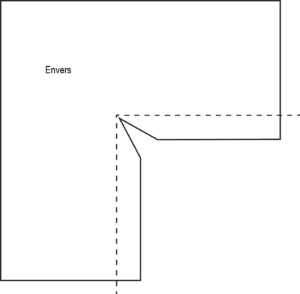
- Then iron your seam, finishing it like an French seam in a straight line, stitching on the dotted line as shown in the drawing.
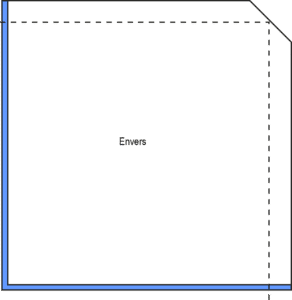
Perform this technique from an external angle:
- Place your fabric wrong-side up, and mark your stitching values at 5 and 15 mm (the second is 10 mm from the first at 5 mm).
- Draw a diagonal line at a 45° angle to the fabric, passing through the corner of the 15 mm mark.
- Sew the fabrics wrong sides together along the line , 5 mm from the edge. Sew along the diagonal marked in step 3 (dotted red on the drawing).
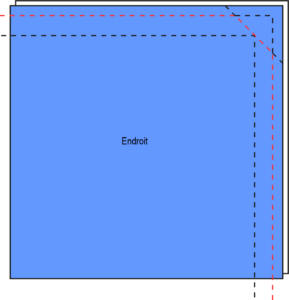
- Trim the corner by cutting 5 mm from the stitching.
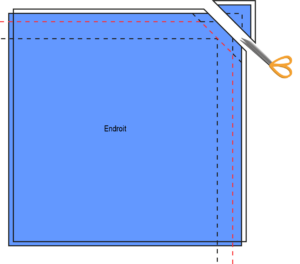
- Then iron your seam, finishing it like an French seam in a straight line, stitching on the dotted line as shown in the drawing.
To go further with this technique, or if you prefer videos, find my tutorials and associated patterns in the list below.
No more excuses for your finishing touches – from now on, they’ll be impeccable!
My French seam video tutorials:
- This sewing technique on video.
- The fake French seam hack.
- French seam in the inner corners.
- French seam in the outer corners.
Three sewing patterns to put this technique into practice:
Find my free tutorials and patterns on my store to learn how to sew French seams:
- The Tote Bag from an Umbrella (free tutorial)
- The Cache-Cache bag (free tutorial)
- The Picodon skirt (sizes 1 to 10 years.)