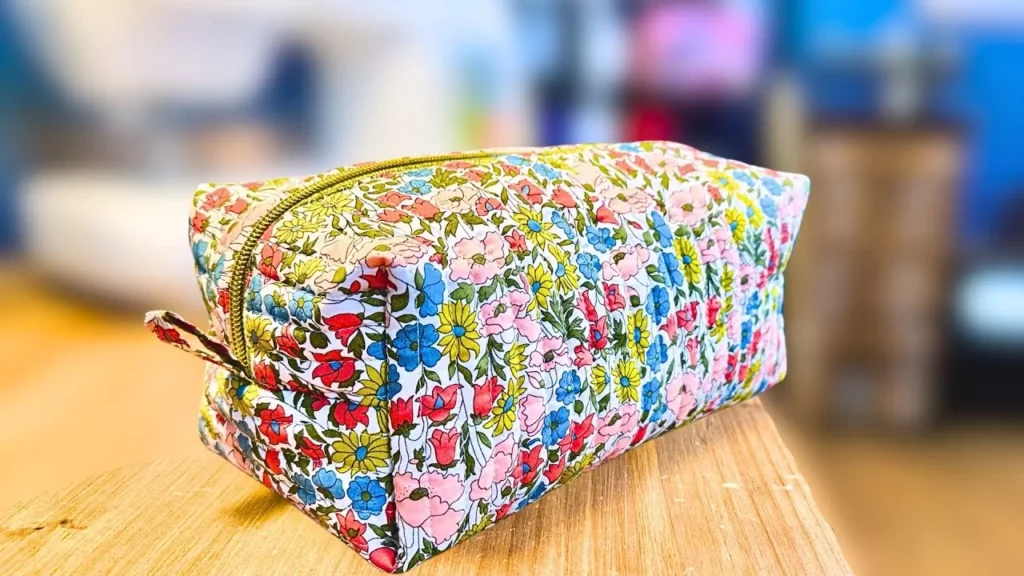
Quilted Case
Want to sew a quilted pencil case quickly and easily? Follow my step-by-step tutorial to create a practical and stylish accessory!
If you’d rather follow this video tutorial, it’s at the very bottom of the article 🙂
What you need
To sew this small fleece pouch, you will need :
- 1 rectangle measuring (H) 46 cm x (W) 36 cm for outdoor use. In the video, I’m using a Liberty fabric.
- 1 rectangle of the same dimensions for the inside. A simple printed poplin will do.
- 1 rectangle (H) 50 cm x (W) 40 cm in fleece, for quilting the kit
- 2 rectangles measuring (H) 10 cm x (W) 5 cm, to make the kit’s tabs.
- 1 x 40 cm zipper
And your usual sewing equipment, of course!
Quilting
Start by drawing a line from top to bottom, with a fading pen or tailor’s chalk, right down the middle of the outer fabric rectangle. Then place the face in the outer fabric on top of the batting rectangle. The batting is likely to shrink during sewing, so it’s normal for it to be larger than the kit fabric rectangle. Pin the fabric to the batting and run through the sewing machine.
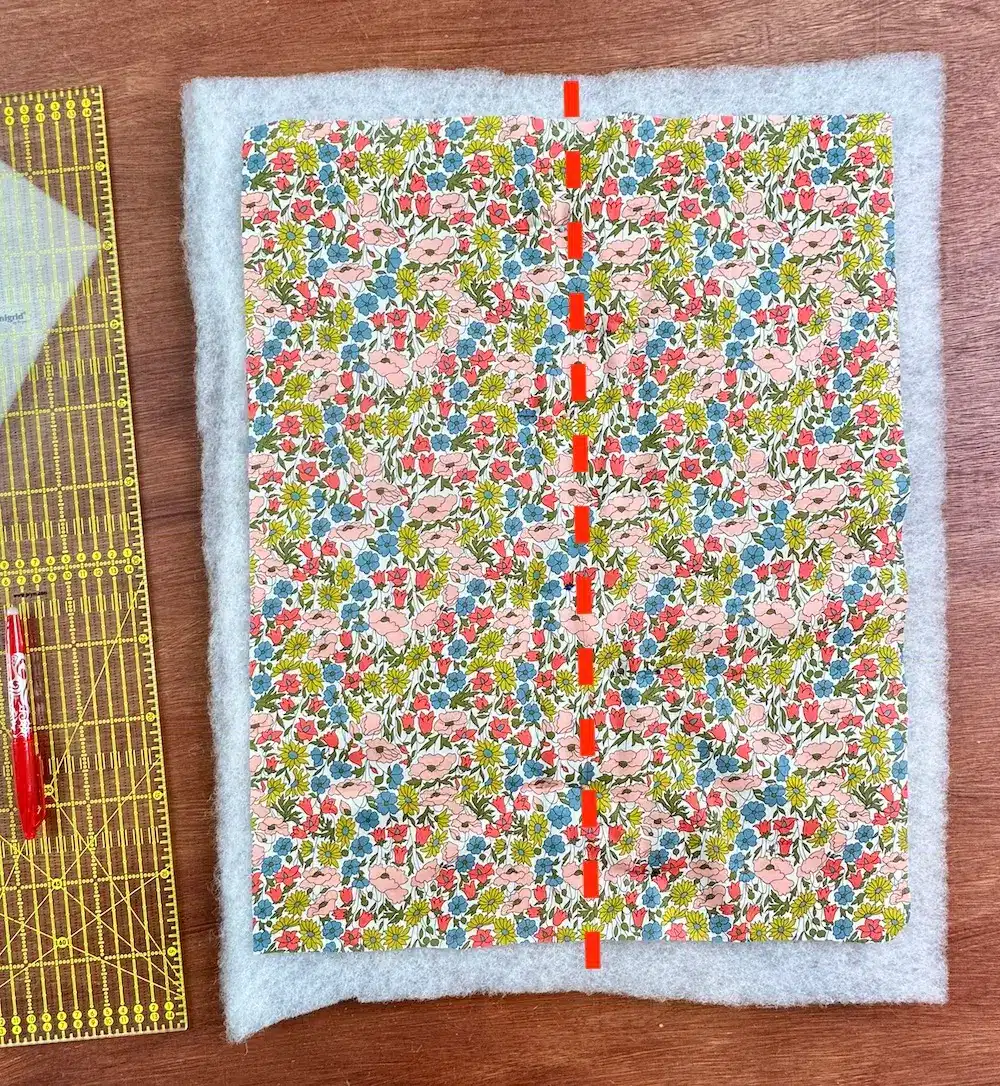
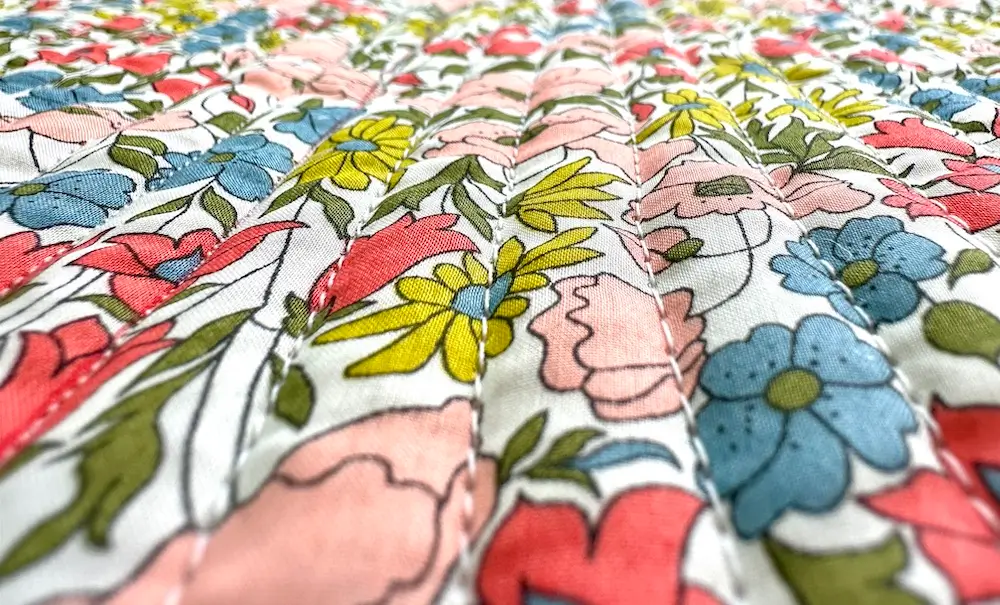
The first stitch is made directly on the marked center line. Then use this first seam as a reference, and stitch parallel seams 3 or 4 centimeters apart. I use the width of my presser foot to avoid having to draw lines.
Sewing the zipper
We’ll now move on to sewing the kit itself!
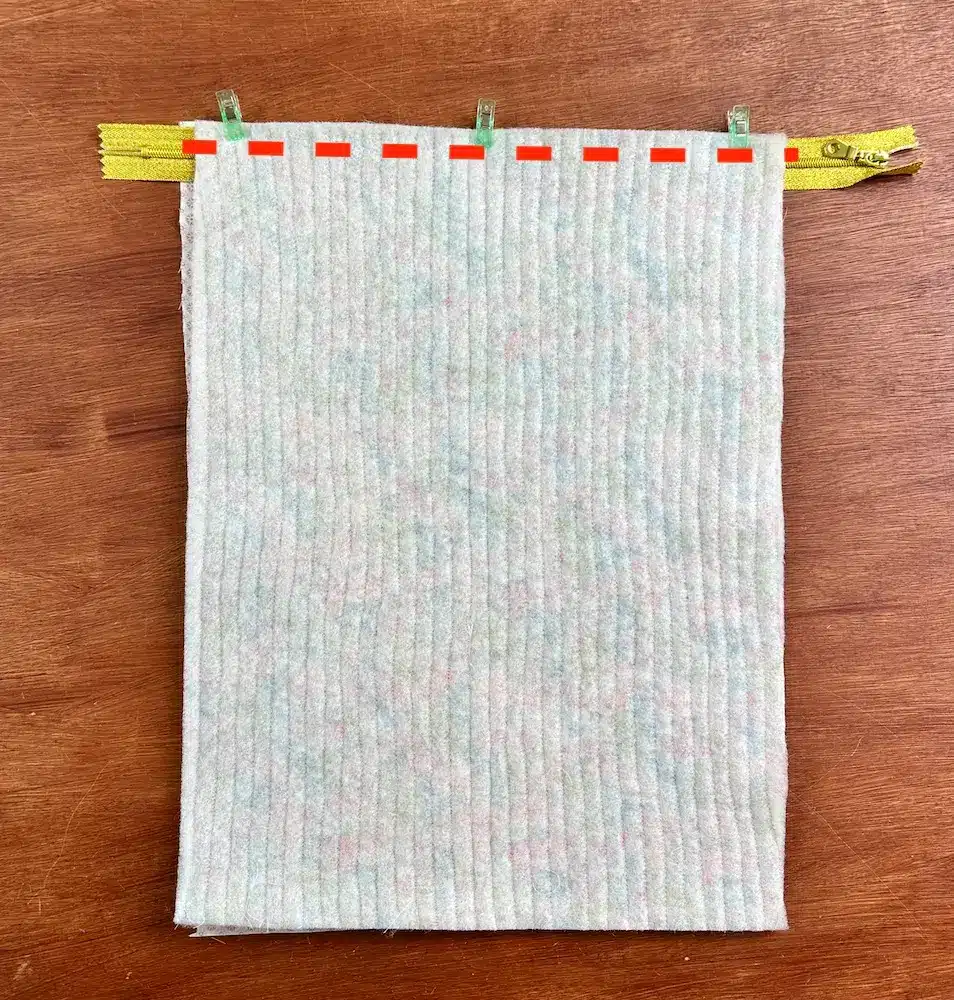
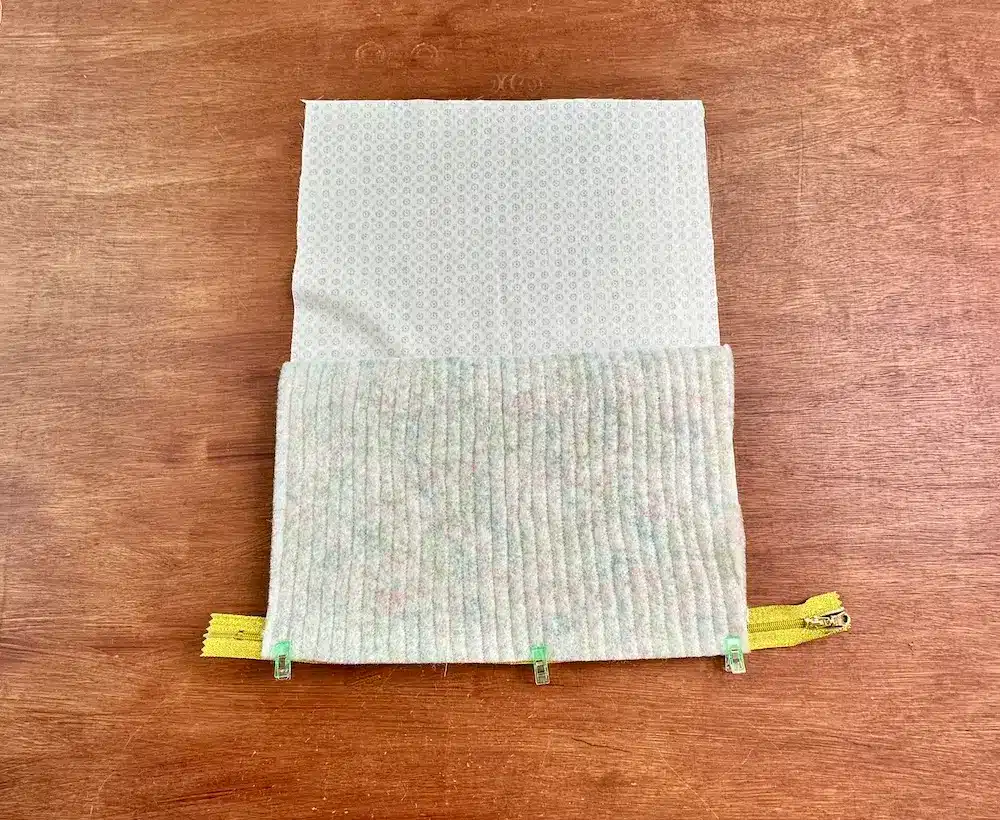
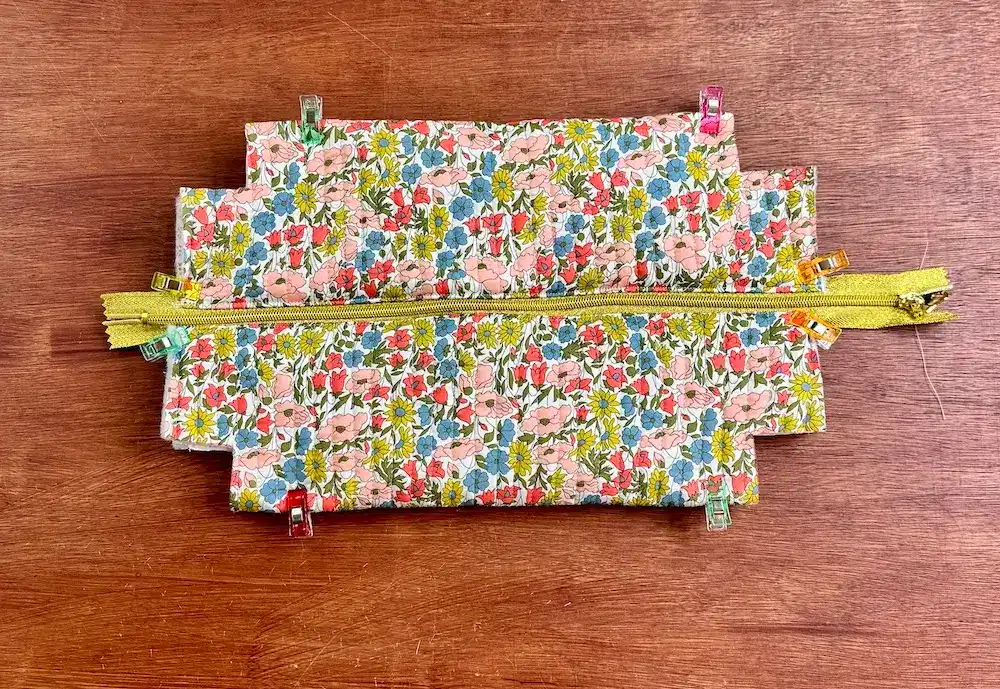
We start by placing the rectangle in the outer fabric (which we’ve just quilted) right sides together. Then, right-side-up, we place the zipper over it, making it protrude on both sides. Don’t panic, this is normal. The slider of your zipper should be on the outside.
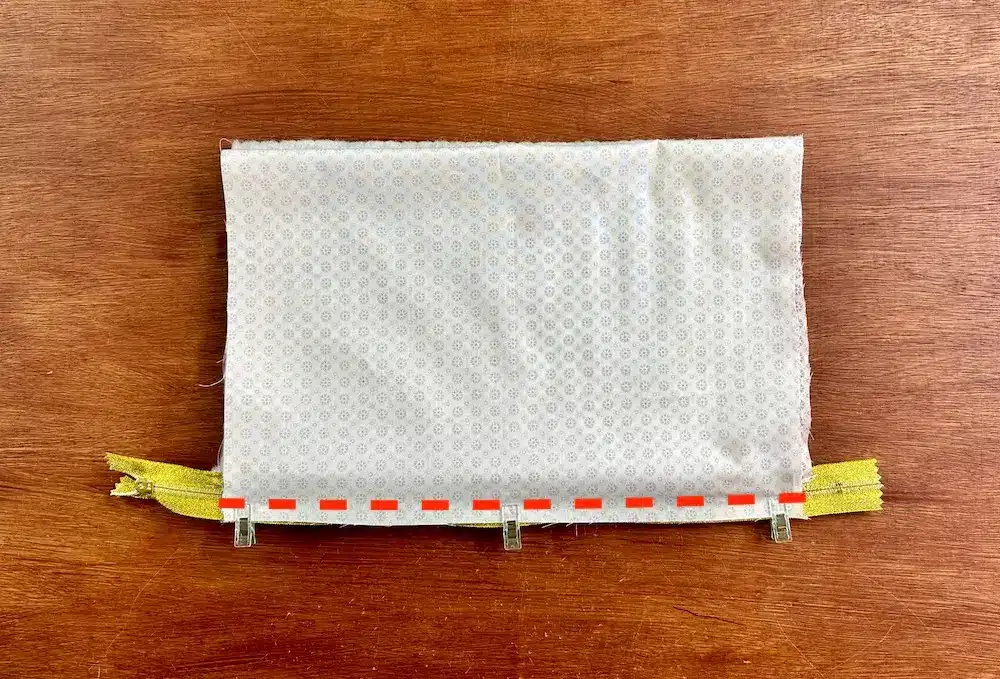
Finally, on top again, we place the rectangle in the lining fabric. Align the edges and corners, and we’ll sew the zipper side with a straight stitch, as close as possible to the zipper teeth.
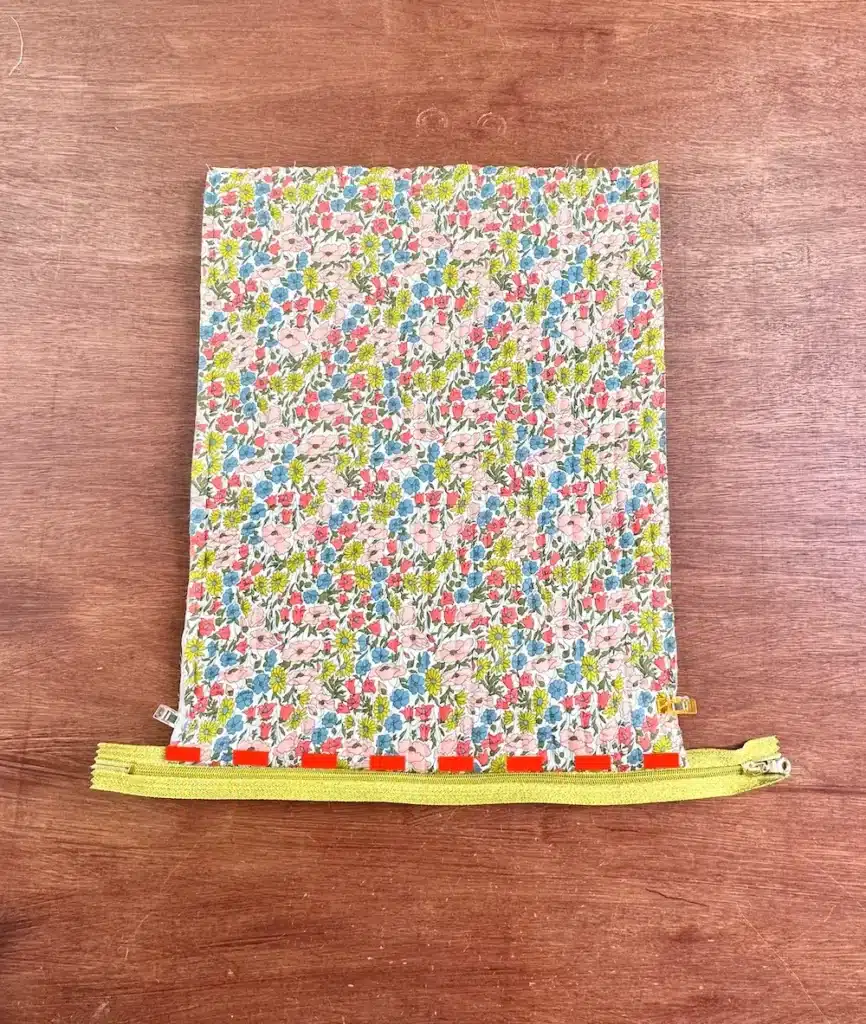
Pass the outer fabric and the lining fabric along the same side of the zipper, pull the 2 rectangles tightly together and stitch along the entire length of the zipper. This topstitching locks the 2 fabrics together, preventing them from jamming in the zipper slider afterwards.
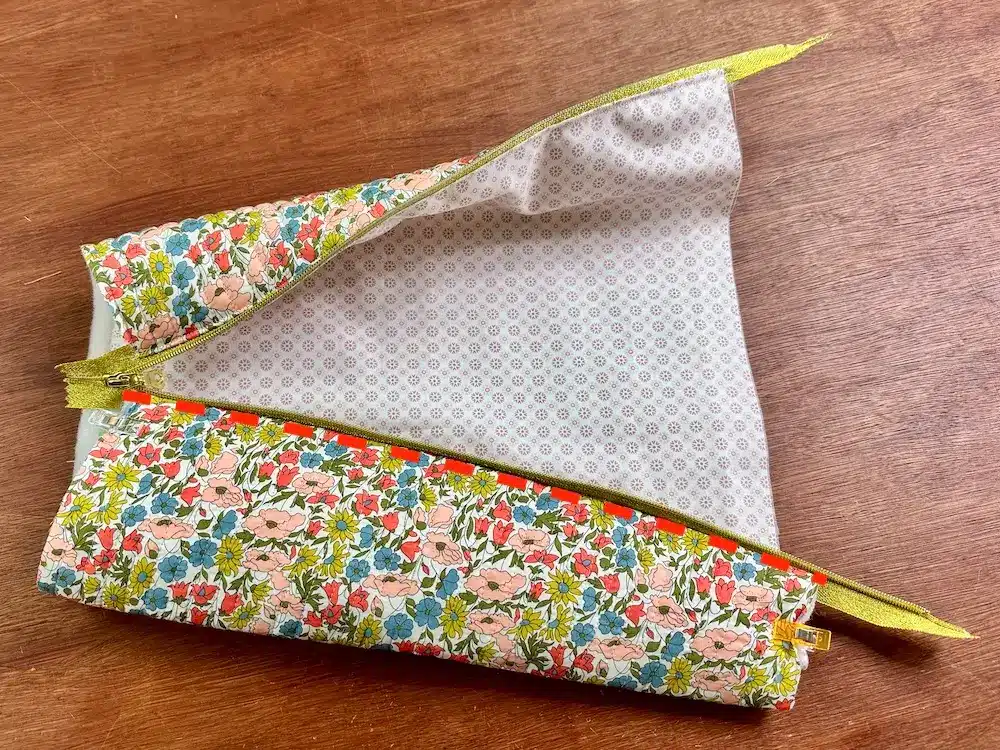
Now we’ll sew the other end of the rectangle of outer fabric and lining to the other side of the zipper. To do this, fold the outer fabric right sides together, and align the short side against the zipper. Pin all the way through, then turn your kit inside out on the lining side.
Again, fold the lining right sides together, in the same way as the outer fabric. Transfer the pins along the entire length of the zipper, and transfer to the sewing machine. Sew as close as possible to the zipper teeth, in straight stitch, using the zipper presser foot.
Again, we’ll run the 2 rectangles of outer and lining fabric wrong sides together, then topstitch along the entire length of the zipper teeth. This topstitching locks the outer and lining fabrics together to prevent the zipper slider from getting caught in either fabric.
La Formation de la Trousse
We’ll now lay the kit flat, with the zipper right in the middle. Then draw 4-centimeter squares in each corner.
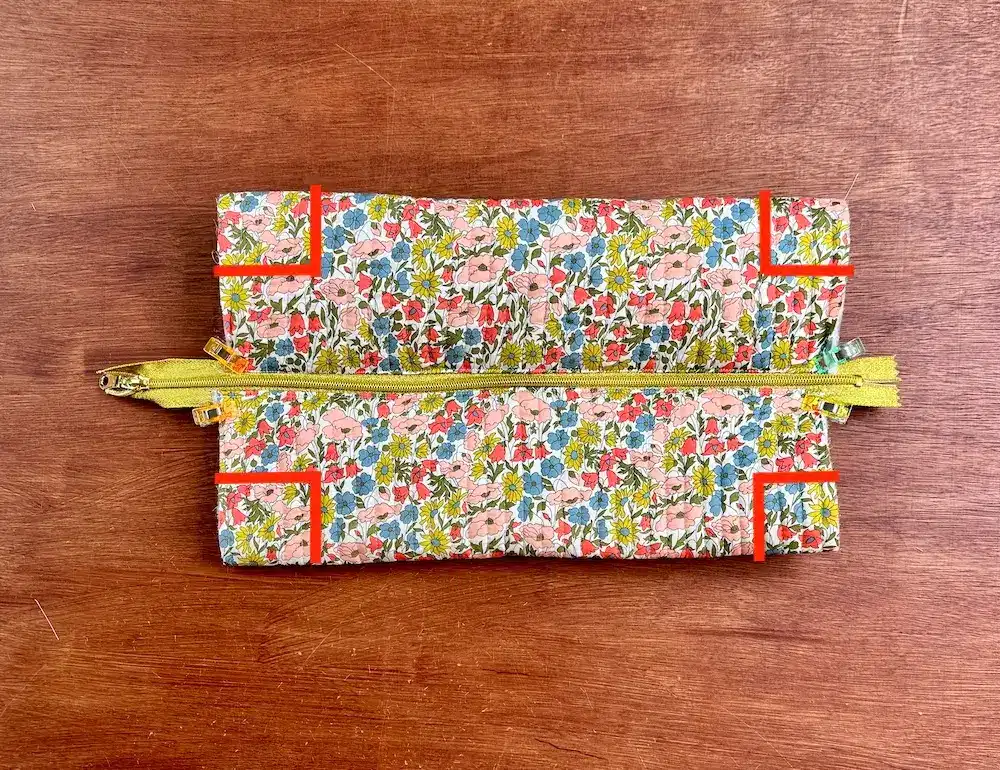
We cut and remove the corner squares. Before moving on, we’ll iron the kit inside out, and open the zipper so that its slider is inside the kit.
And we’ll put the kit aside while we work on the tabs.
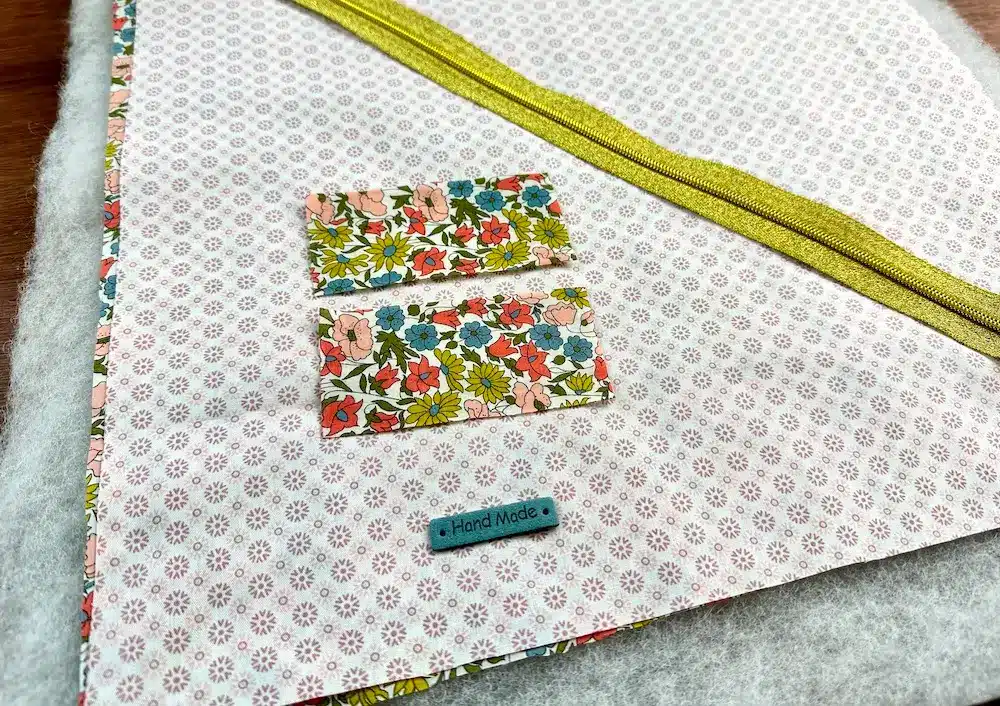
Les Languettes
Place the 2 rectangles of the tabs face down, and fold in 1 cm, with the long sides facing inwards. Then fold the rectangles back on themselves a 3rd time.
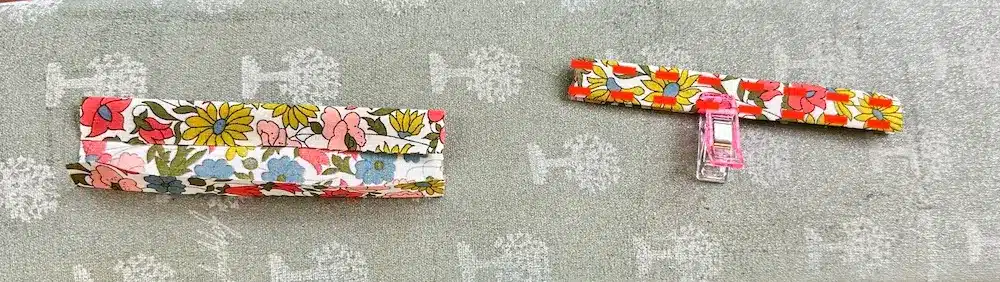
On the sewing machine, stitch 2 topstitches as close to the edge as possible, using a straight stitch along the long sides.
The 2 strips are folded over to form a loop.
We now place the 2 loops directly on the zipper, on either side. The loops are on the inside of the kit, and the raw edges of the zippers are on the outside.
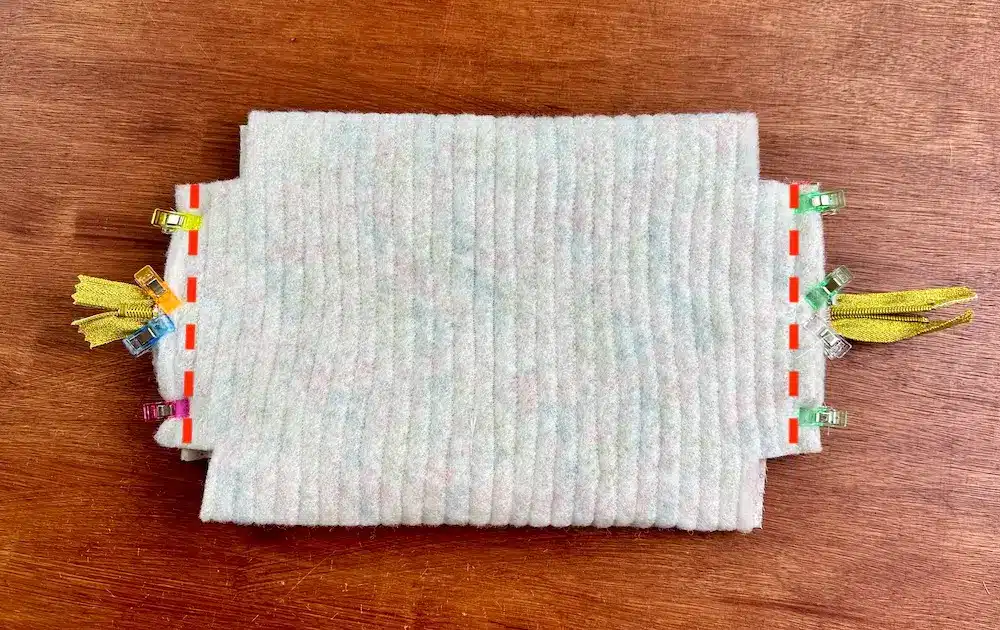
We’ll machine-sew the 2 sides of the kit, taking care when stitching on the zipper.
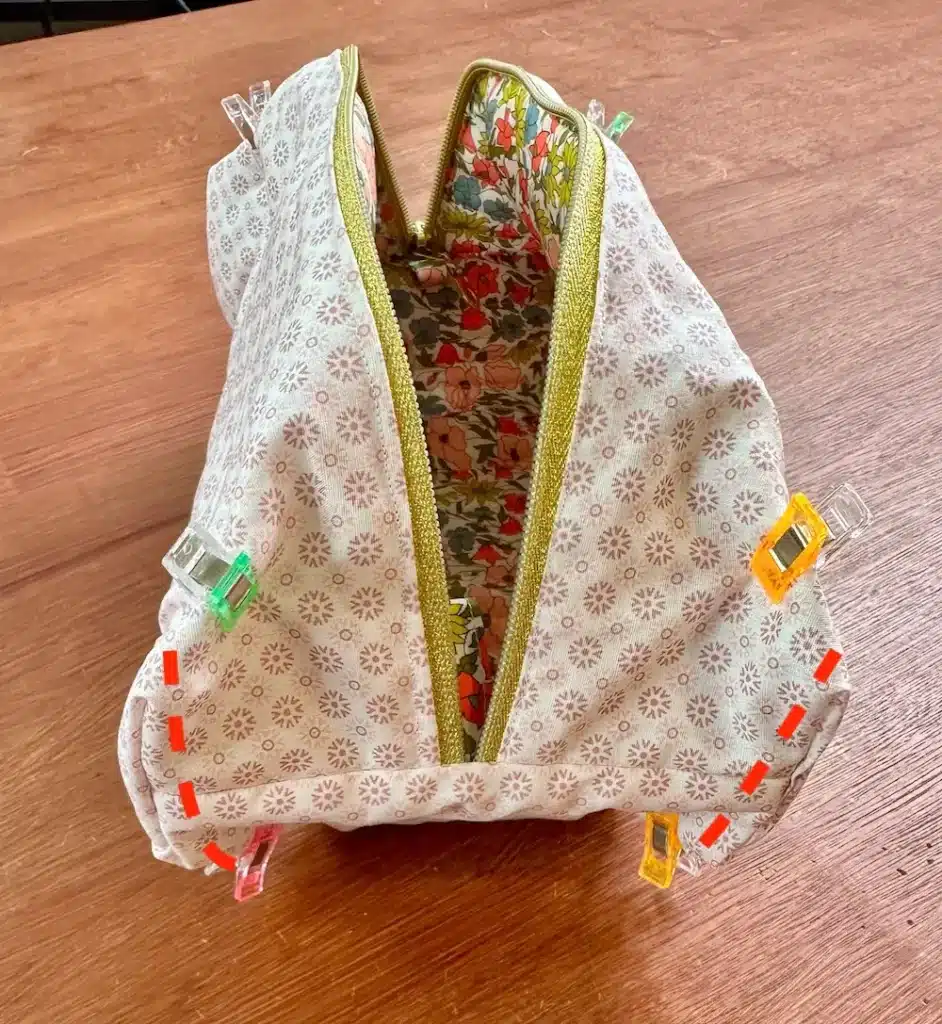
Sewing corners
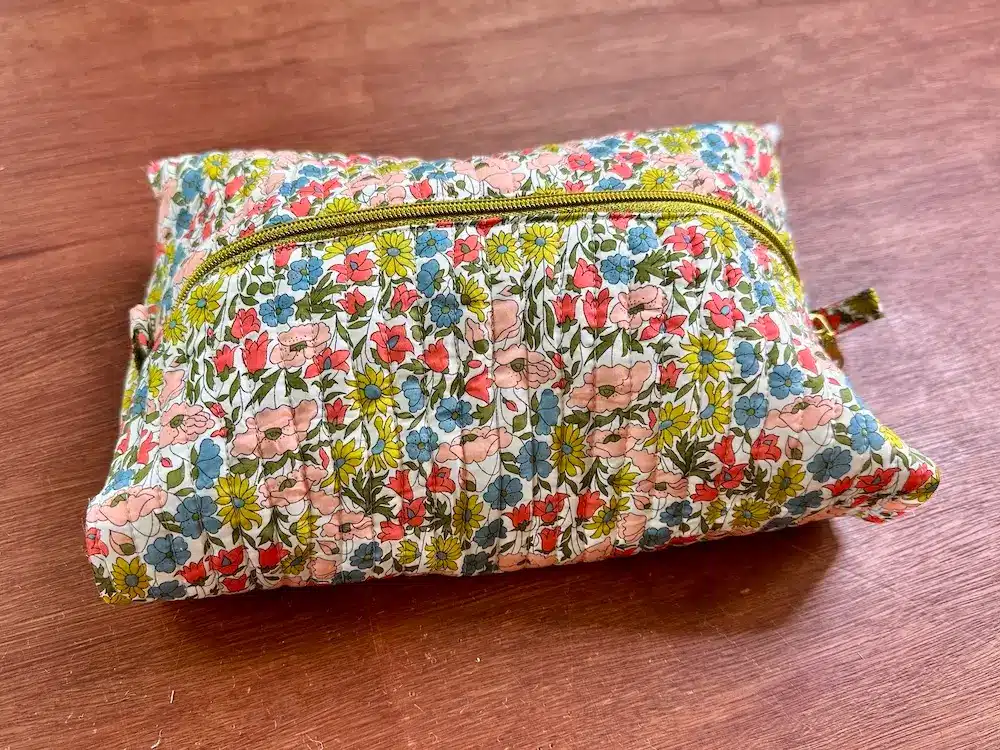
Once back on the right side, your kit should now look like this:
To sew the corners, and ensure that the raw edges are hidden, we’re going to make an English seam.
To do this, pinch the corners using the lining fabric and the outer fabric. Then, on the sewing machine, we stitch 0.5 cm from the edge, using a straight stitch.


Now turn the kit inside out, press the 4 corners together and stitch again. But this time, 1 cm from the edge. This second stitch has the effect of enclosing the seam allowances of the first, at 0.5 cm.

Now you can turn your kit over one last time on the spot, and you’re done! Congratulations!