The hide-and-seek Bag
Many adventurers want to be able to travel in total peace of mind, without fear of losing (or having stolen) their precious belongings!
Whether you’re off for a day on the town, a hike, or a trip to the other side of the world, keeping your personal belongings safe is a priority. That’s where the Cache-Cache Pouch comes in, a discreet pouch you can sew yourself to wear under your clothes. Easy to make, comfortable and practical, this pouch is designed to blend in under a t-shirt or jacket, keeping money, identity papers or small items well away from prying eyes.
In this step-by-step tutorial, we’ll show you how to create your own hide-and-seek pouch and travel with a clear conscience!
There’s no pattern to download, and if you’d rather follow the video tutorial, it’s at the bottom of the article.
Sewing equipment
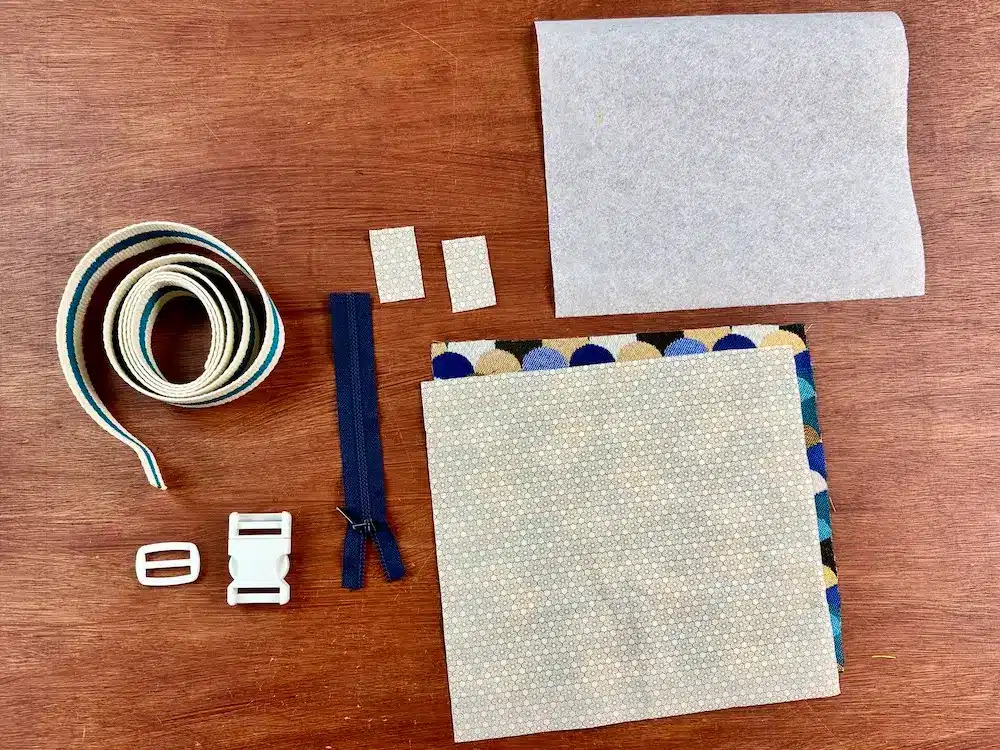
To sew this pouch, you will need :
- 2 rectangles, (height) 26 cm X (width) 24 cm, for exterior and lining.
- 1 rectangle of fusible web type H 250, (height) 24 cm X (width) 22 cm
- 2 rectangles of (height) 5 cm X (width) 3 cm, for the closing stops.
- 1 x 20 cm zipper
- 130 cm of 30 mm webbing
- 1 x 30-mm snap ring
- 1 x 30 mm loop
And, of course, your usual sewing equipment!
Sewing the Cache-Cache satchel
The zipper
We start this bag by preparing the zipper. Position the stops right sides together at the ends of the zipper. Stitch 1 cm from the edge.
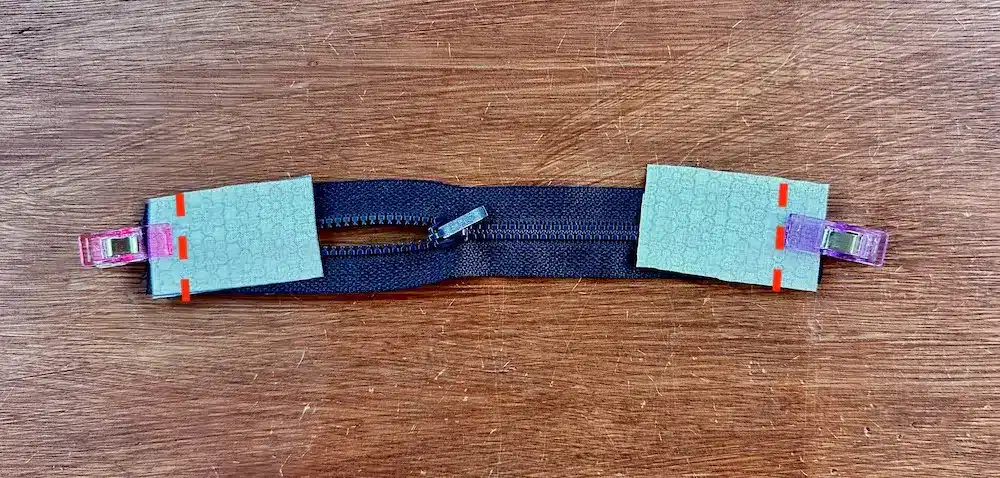
We replace the stops on the right side, and stitch again, but this time as close to the edge as possible.

Place the rectangle in the outer fabric, right sides together. On top, right sides together, we place the zipper we’ve just prepared. Center the zipper and rectangle.
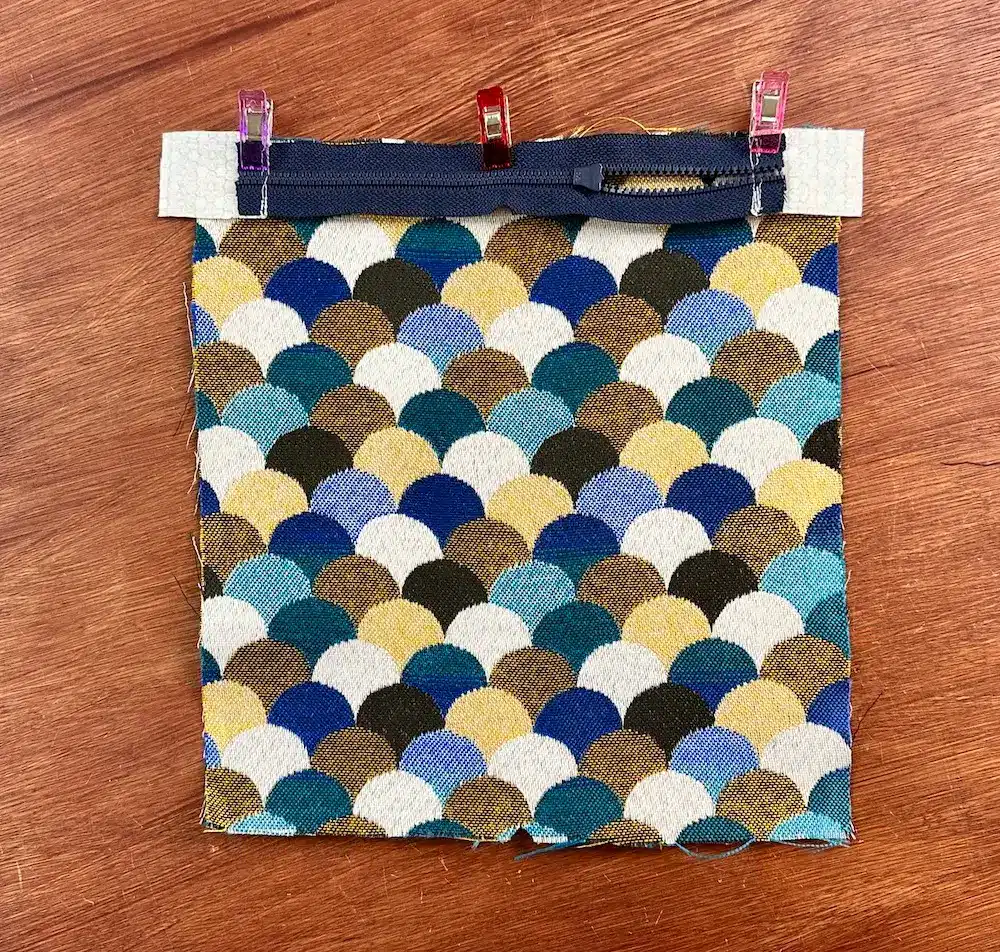
Then, right sides together, we place the lining rectangle on top. We’ll sew all along the zipper teeth, in straight stitch, using the zipper foot.
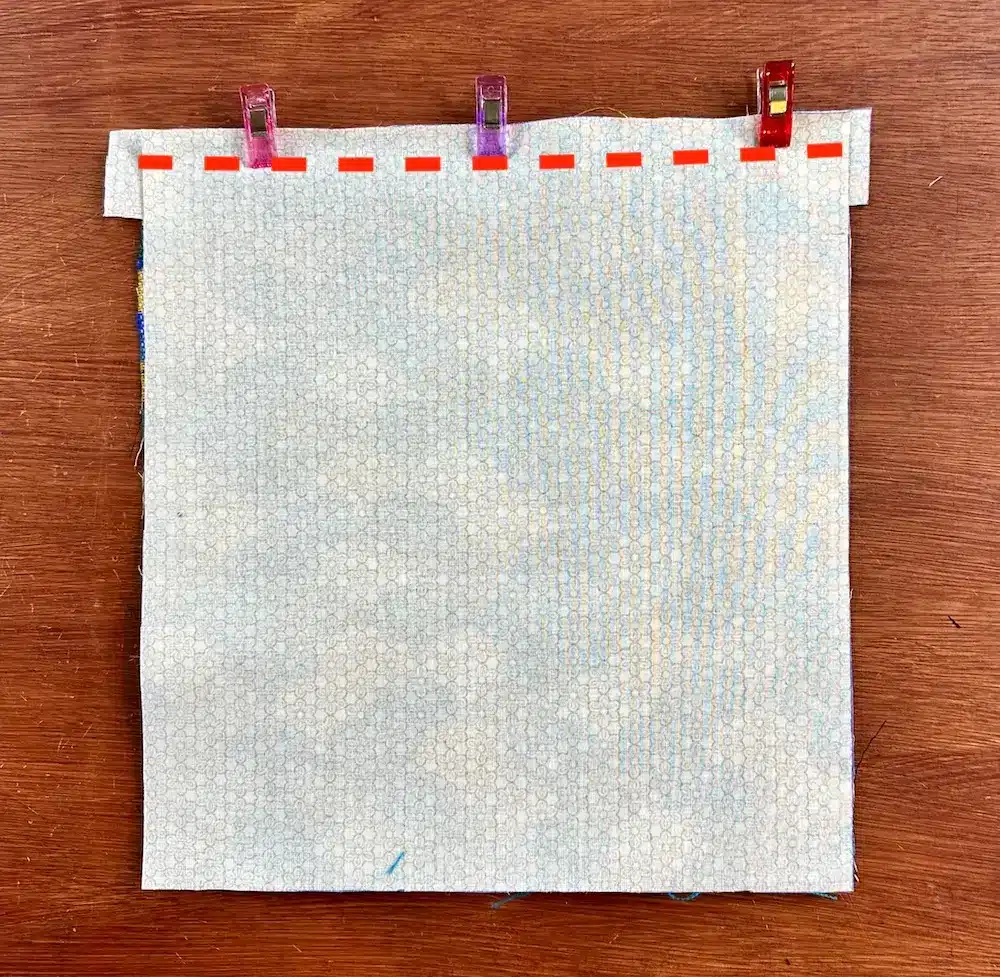
We now place the outer fabric and the lining fabric wrong sides together, pull the 2 rectangles taut so that they don’t get caught in the teeth of the zipper, and topstitch the fabric as close as possible to the first seam.
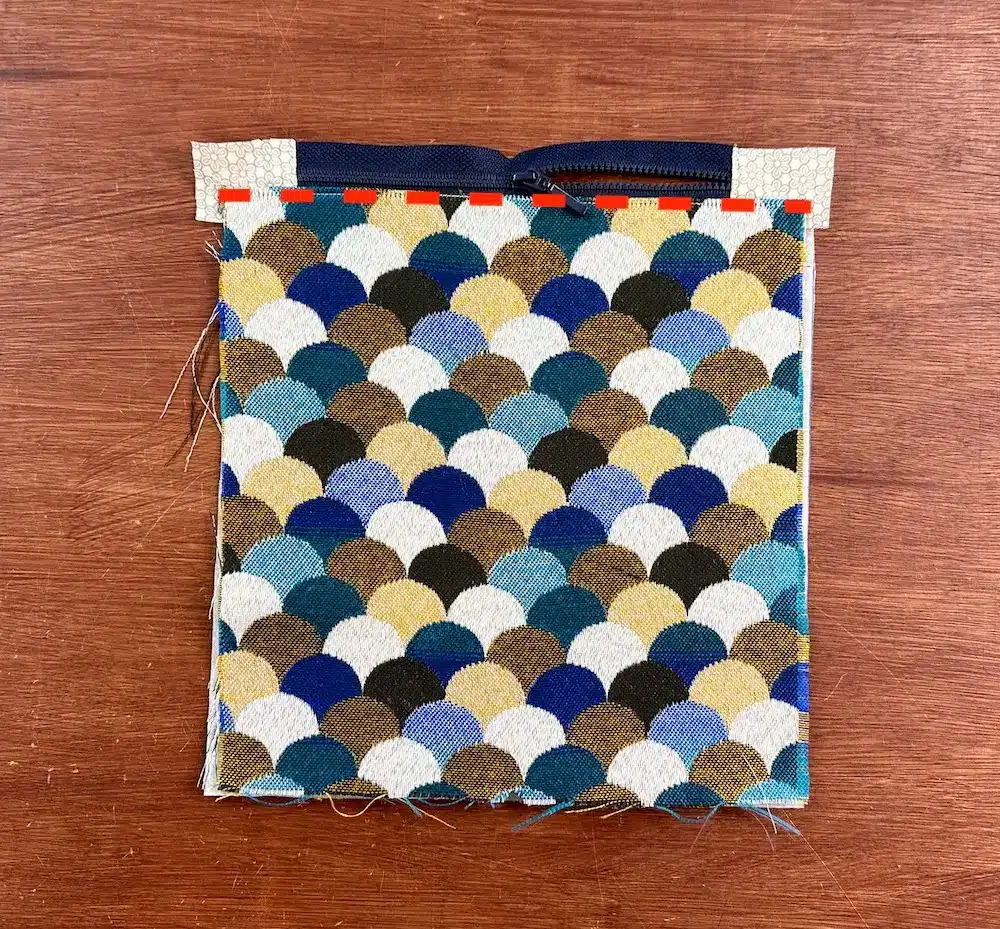
We now turn the pouch right side out, and shape it correctly. Next, we place the zipper 2.5 cm from the top of the pouch. Make sure this measurement is the same all the way round, and pin in place.
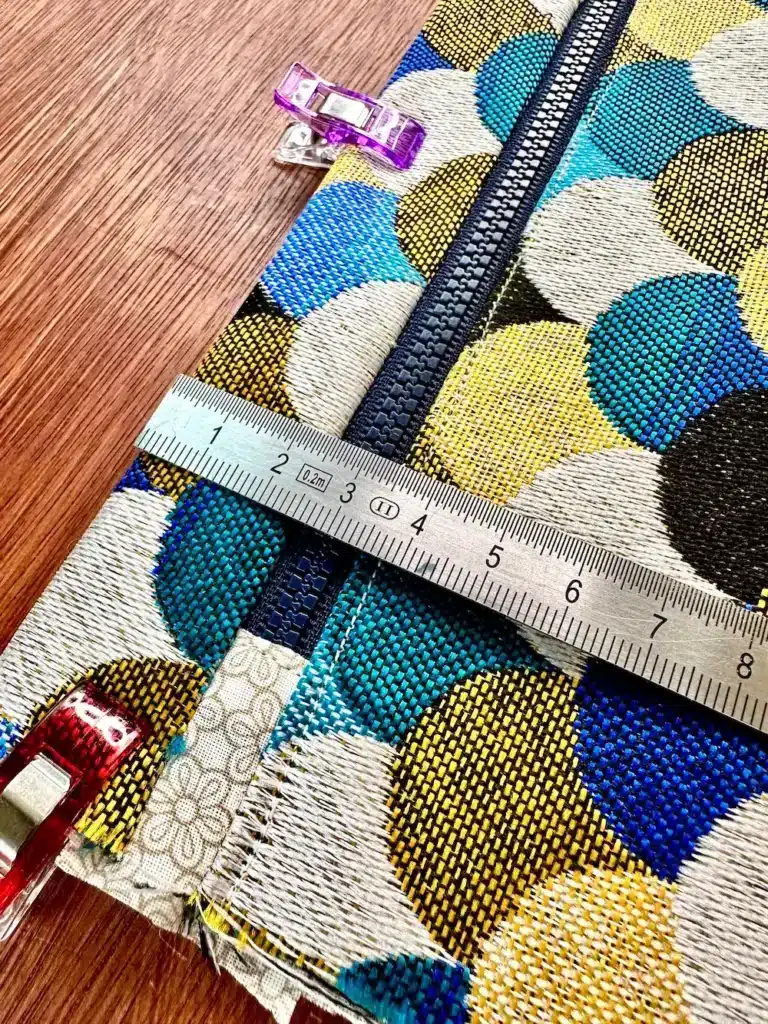
French seam
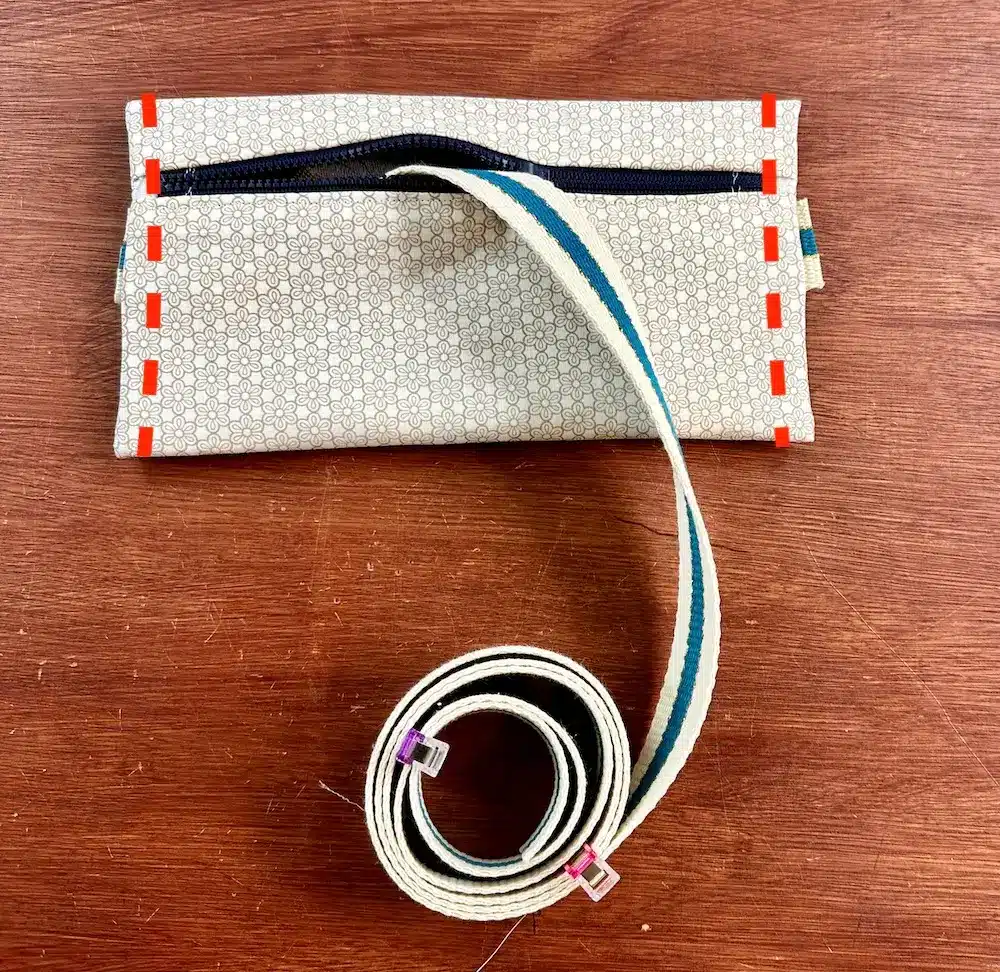
Next, we’ll place the strap elements. There are 2 pieces to cut: a short one of 15 cm, and a longer one of 115 cm. We place the top of each piece of webbing in line with the bottom of the zipper.
Next, we’ll make an English seam. So, we stitch the 2 sides 0.5 cm from the edge, using a straight stitch.
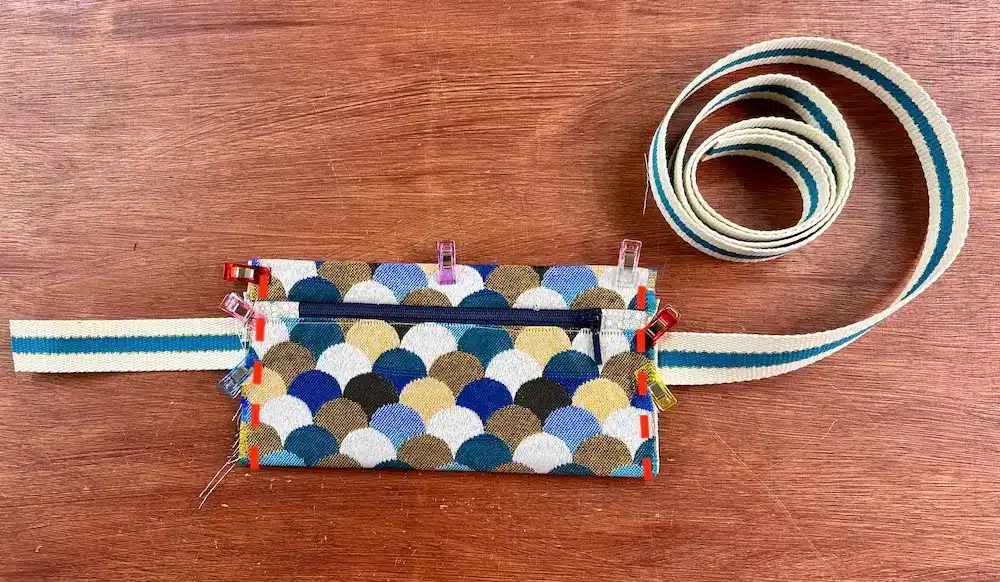
We turn the bag inside out and give it a nice shape by pressing the corners together. Then we sew the sides again, but this time 1 cm from the edge. Be very careful not to sew the 2 pieces of webbing on the inside. If you’re worried about getting it wrong, don’t hesitate to pin the long piece of webbing to prevent it from wandering off!
On the side where the strap is shortest, you place the female part of the “bouclip”. Pass the strap through the clasp from above, then fold it in on itself and sew 2 parallel seams.
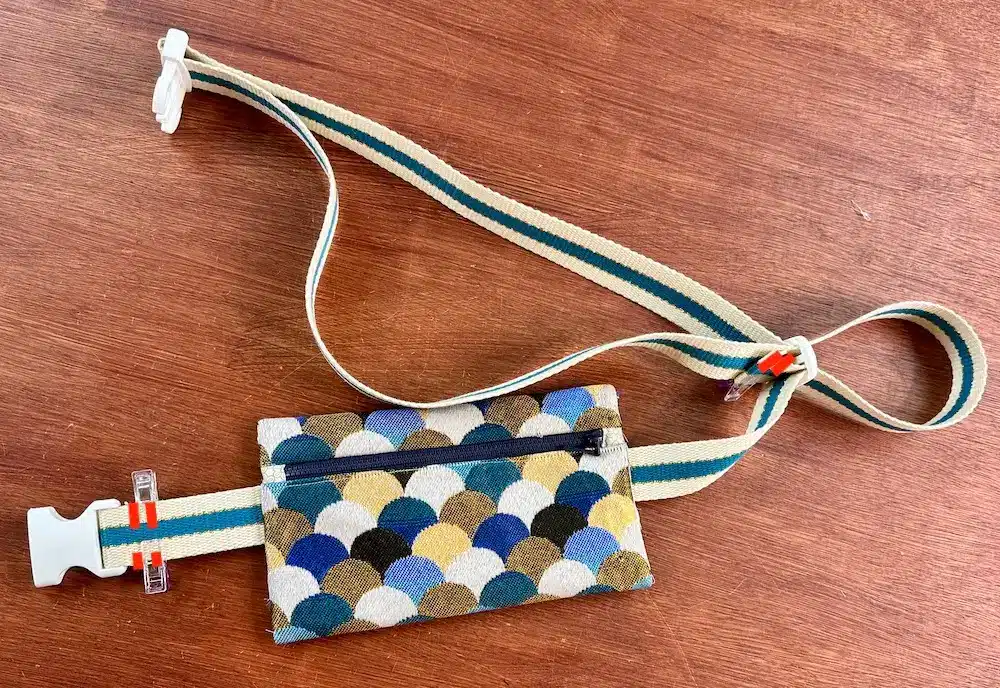
For the other piece of strap (the long one), we’ll first pass it inside the tightening loop, then through the male part of the “bouclip”, back into the tightening loop and out again, folding the end and stitching 2 parallel seams.


